Creating Custom Paper Sizes: Difference between revisions
From SambaWiki
Mmuehlfeld (talk | contribs) (Rewrote documentation. Added some additional information, restructured the procedure, used updated images.) |
Mmuehlfeld (talk | contribs) m (Updated link) |
||
| Line 1: | Line 1: | ||
To create custom paper sizes on a Samba print server: |
To create custom paper sizes on a Samba print server: |
||
* [[ |
* [[Setting_up_Samba_as_a_Print_Server#Granting_the_SePrintOperatorPrivilege_Privilege|Connect to the print server using the Print Management console]]. |
||
* Navigate to the <code>Print Servers</code> entry, double-click your print server, and right-click to the <code>Forms</code> entry. |
* Navigate to the <code>Print Servers</code> entry, double-click your print server, and right-click to the <code>Forms</code> entry. |
||
Revision as of 01:18, 21 January 2017
To create custom paper sizes on a Samba print server:
- Navigate to the
Print Serversentry, double-click your print server, and right-click to theFormsentry.
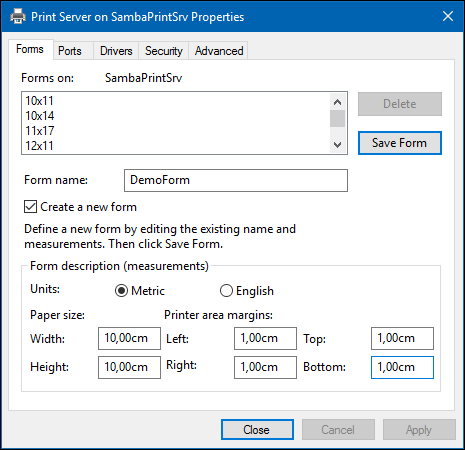
- Select
Manage Forms.
- Select
Create a new formand fill the fields.
- Click
Save Form.
- Click
OK.
The new form is stored in the /usr/local/samba/var/locks/registry.tdb database on the Samba print server.
You can select the form when preconfiguring a printer. For details, see Preconfiguring a Printer.

